45Squared utilizes Mailchimp as its email platform. We use it send out cool updates of products we are working on, security-related updates and lots of tips and tricks. It is a great way to communicate with all of our customers quickly while tracking important metrics. If you are unfamiliar with the platform take a second to sign up for a free account!
While Mailchimp is great for sending emails sometimes we want to include dynamic content such as our latest blog posts. We could easily type them out one by one and link back to the articles but, what if we could do it automatically from an RSS Feed?
This article will demonstrate how to create a simple email template with WordPress RSS Feeds and MailChimp.
RSS Feeds Inside MailChimp
By default, WordPress does not send images with its RSS feeds. We installed RSS With Images this simple plugin allows you to specify the size of the image you want to send with the RSS feed. We chose 200px by 200px. It is relatively small but gives your reader a good idea of what your article is about.
NOTE: Any images uploaded before the plugin was installed will not send. You must manually go and re-upload them to each post individually.
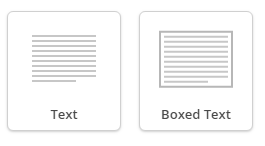
Once you have the plugin installed it is time to login to your MailChimp account. We are going to assume that you understand how to create a basic campaign. Our work begins in the “Design” step of the campaign. Add a text box or boxed textbox to begin programming your RSS Feed.

Inside your textbox add the following merge tags:
*|FEEDBLOCK:FEEDURL|*

*|FEEDITEMS:[$count=3]|*

*|FEEDITEM:IMAGE|*

*|FEEDITEM:TITLE|*

*|FEEDITEM:LIKE|**|FEEDITEM:TUMBLR|**|FEEDITEM:PLUSONE|**|FEEDITEM:TWITTER|*

*|END:FEEDITEMS|*

*|END:FEEDBLOCK|*
Each of these elements pulls in a different part of your RSS feed or adds different functionality. There are a bunch of merge tags that you can use documented in MailChimps Knowledgebase.
The first thing to change is the FEEDURL. Replace this with the URL of the RSS feed you want to display in your campaign. As you go down the tags you can see we are specifying the count of posts with the [$count=3]. Change this to however many posts you would like to display. Obviously the more posts you display the longer your email.
One thing that we specifically wanted was to have our title be a link to the article being displayed. To do this we needed to modify the source code of our campaign by adding in the line:
"<a href="*|FEEDITEM:URL|*">*|FEEDITEM:TITLE|*</a>"
This embeds our post URL as a link while displaying the title of the post as the link text. Remove the quotes at the beginning and end if you are going to use this.
The last thing to consider is formatting. Simply entering in these merge tags will display as regular text. Use the MailChimp built-in editor to pretty up your design.
This guide gives you a quick overview of what is possible with MailChimp’s RSS merge tags. We will continue to go more in-depth with the features of MailChimp in future articles. For now, if you have any questions feel free to contact us!

